


By now, you could have seen much more movies in your Instagram feed. Instagram has doubled down on video—and Reels are the platform’s fastest-growing format. If you wish to know the way to make a Reel on Instagram however you don’t know the place to start out, we’ve acquired you coated.
With over two billion month-to-month customers, Instagram’s recognition can’t be denied. The rise of Reels—bite-sized video posts—is the platform’s response to TikTok’s mega-popular micro movies. In reality, 66% of shoppers say short-form video is probably the most participating sort of social content material. And Reels are one of many predominant Instagram content material codecs entrepreneurs need to use to collaborate with creators.
With Reels reportedly receiving round 22% extra engagement than different video posts, it’s time to strike the iron whereas it’s sizzling. Whether or not you’ve by no means made a Reel otherwise you simply need some recent suggestions, we’re going to indicate you the way to make an Instagram Reel, step-by-step.

What are Instagram Reels, and why do you have to use them?
Instagram Reels are brief, multi-clip vertical movies that vary from just a few seconds to 1.5 minutes. Like TikTok, Instagram provides modifying instruments that mean you can simply create your Reel, and add entertaining options like music and captions.
Why use Reels? Briefly, they’re one of the best ways to extend your viewers, attain and might make it simpler to strike viral gold. As Sprout’s Social Media Strategist Olivia Jepson tells us, “Our high movies on Instagram over the past yr have been Reels. Particularly, Reels that encourage and provide rapid worth for viewers.”
Whereas they haven’t outright mentioned the Instagram algorithm prioritizes Reels, the platform has made it clear that video is their precedence—a current take a look at by Instagram turns all Instagram movies into Reels. And accounts that haven’t adopted the sort of content material are feeling the crunch. What’s extra, the platform has made Reels probably the most discoverable content material format, capable of be shared and featured in 4 locations: Tales, a Reels-only tab, the Discover web page and the common feed.
This presents a significant alternative—utilizing Reels provides audiences extra methods to seek out your content material, and provides you extra methods to develop. Experience the recognition wave whereas this format continues to be recent.
The right way to make a Reel on Instagram
Producing a brand new sort of content material can really feel daunting, nevertheless it doesn’t need to be. With Reels, the reward is well worth the studying curve.
Let’s stroll by way of making an Instagram Reel, and tips about the way to make it stand out.
Step 1: Set a technique
The key sauce behind profitable Reels is identical as another content material: Let your model’s voice and values information you.
To create your technique, think about the next:
- Set your objectives: Take into consideration how Reels match into your bigger social media objectives. What do you need to accomplish with them? Rising engagement? Attain? Realizing this forward of time will assist information the forms of Reels you make.
- Know your viewers: Your viewers ought to encourage all your content material. Think about what subjects, types and sounds enchantment to them.
- Kind your content material subjects and buckets: Reels ought to be entertaining, however they don’t must contain dance tendencies. They are often instructional, humorous, dramatic or inspiring. Begin by taking a look at your top-performing content material to establish subjects and themes that work.
- Do your analysis: How do your opponents use Reels, and what gaps are you able to fill?
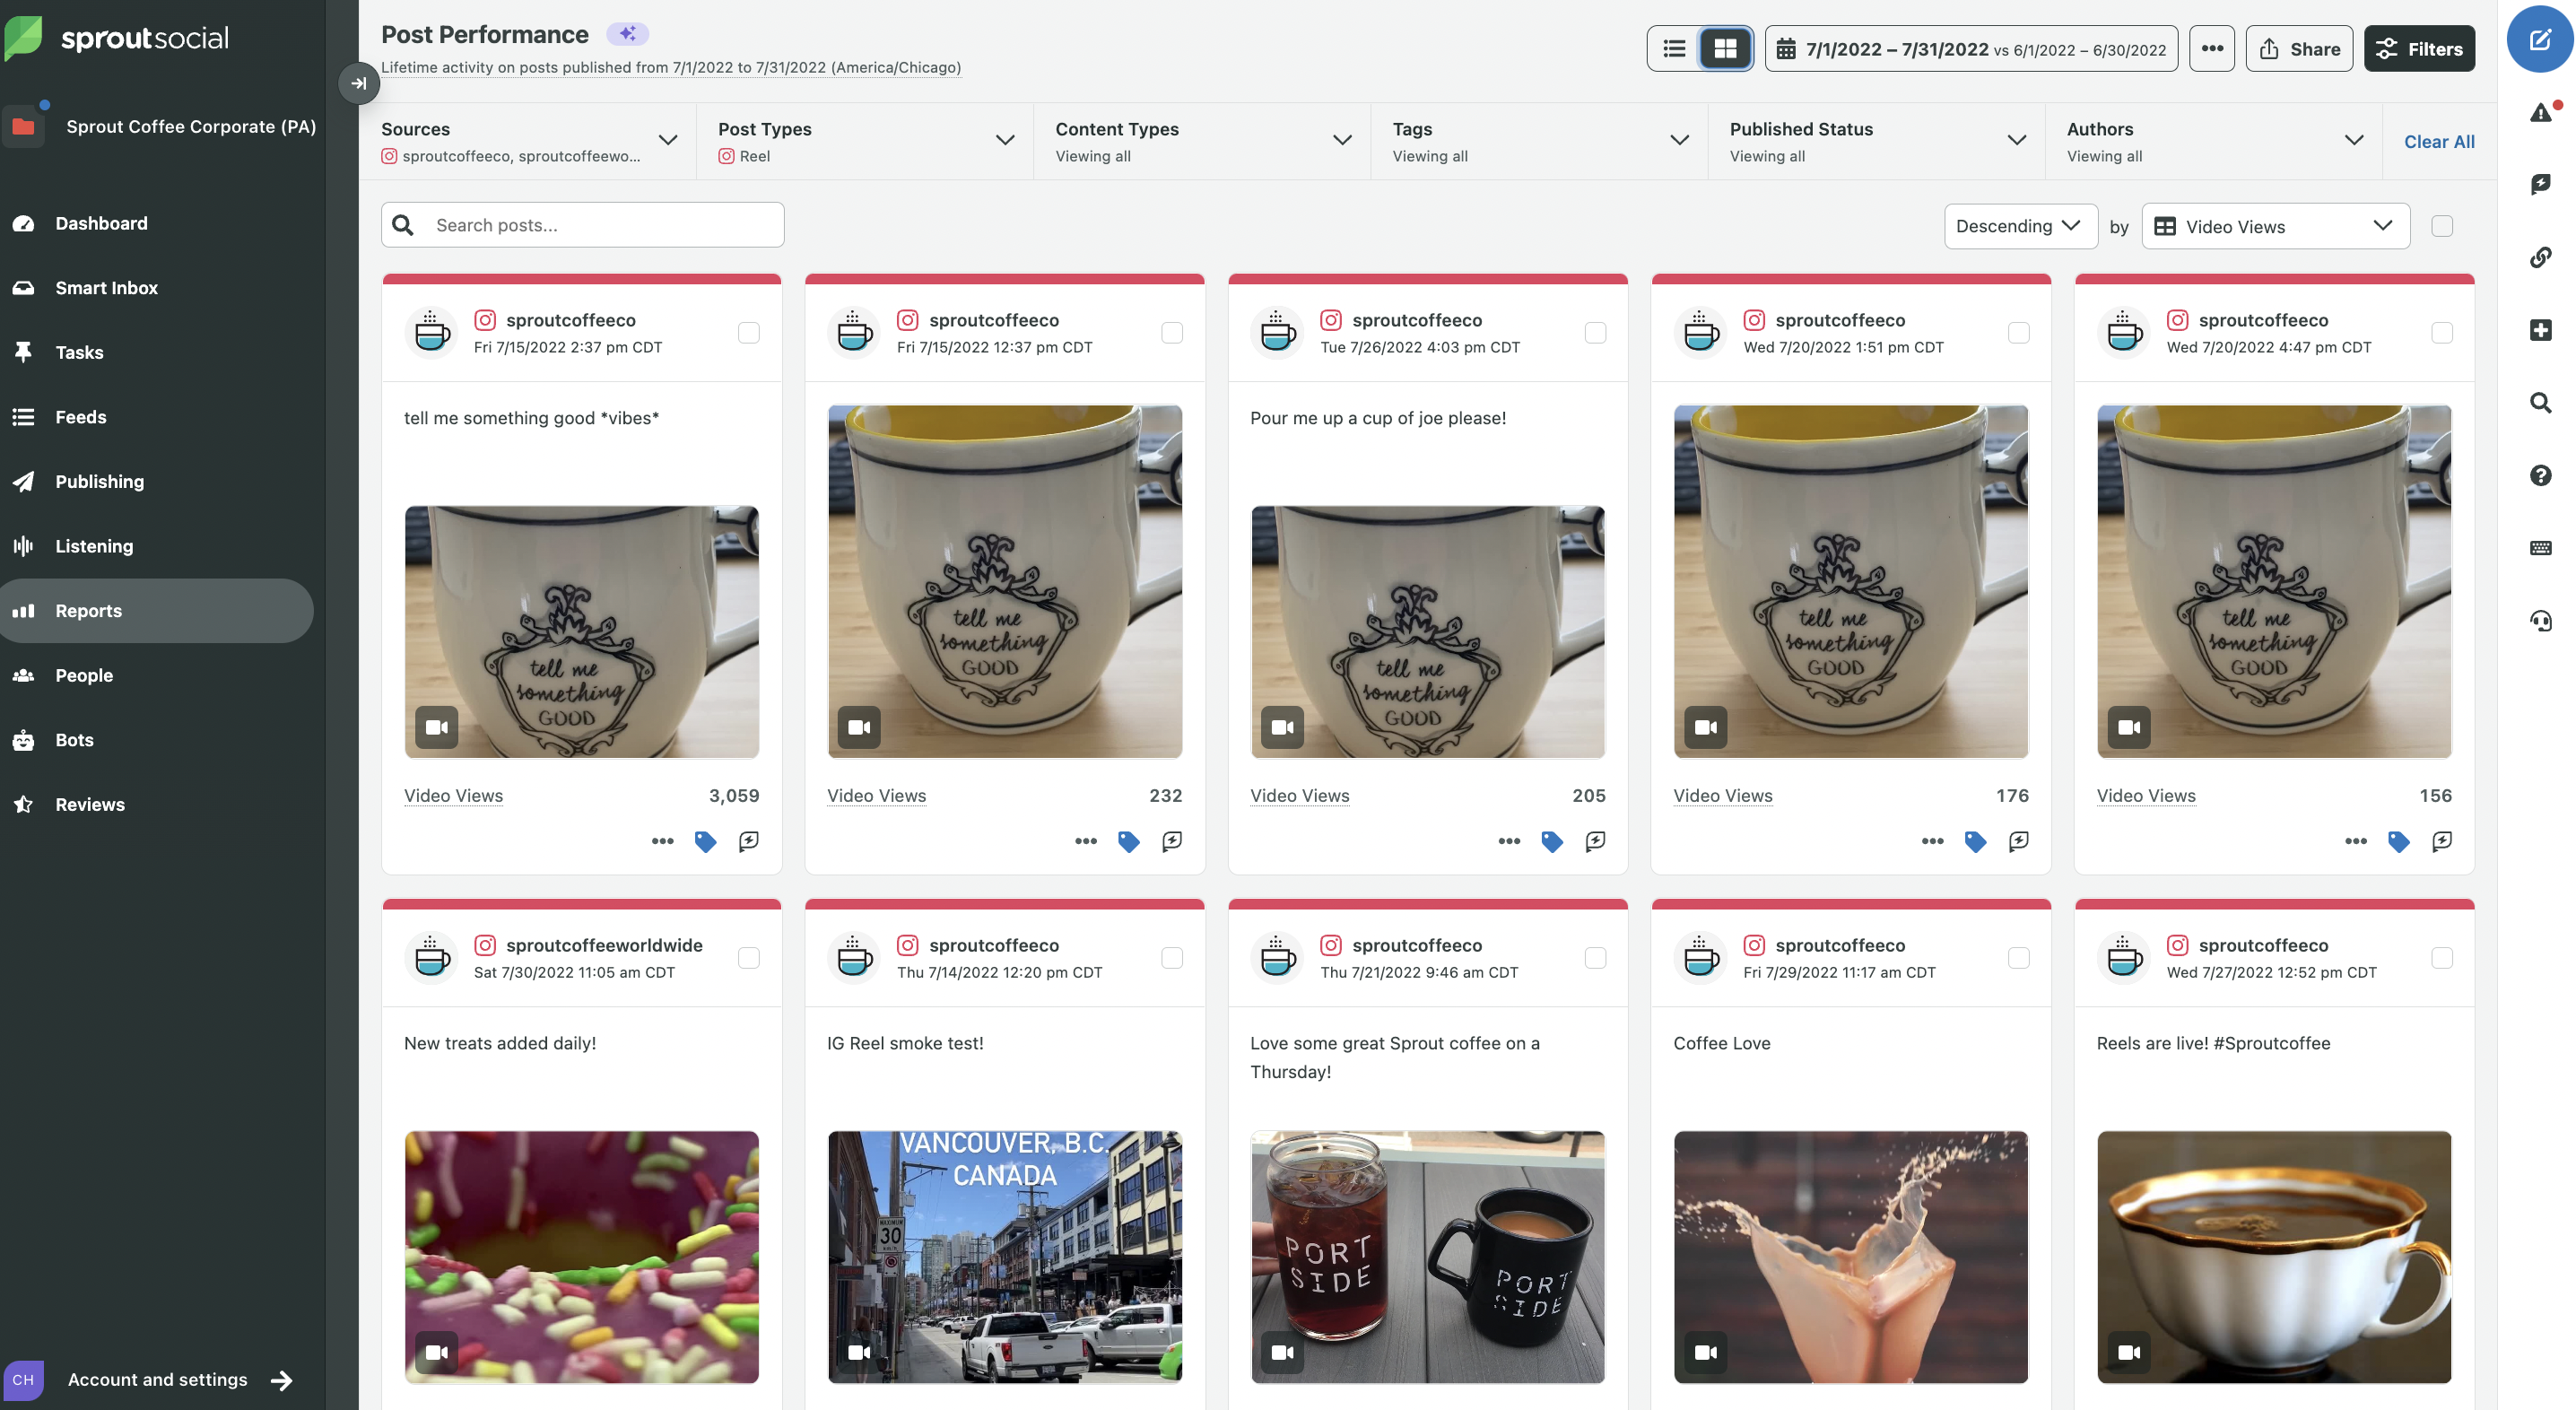
When you begin posting, examine your analytics to see which Reels carry out one of the best. This may make it easier to refine your content material technique. Utilizing a reporting instrument like Sprout Social, you’ll be able to even see how your Reels carry out towards all your content material—on Instagram and past—to show their affect.
Step 2. Collect your footage
That is the place the enjoyable begins—seize your cellphone and open Instagram. Faucet the “+” within the higher proper nook. Then, you’re able to get began.
There are two methods you’ll be able to collect footage in your Reel: filming or utilizing current footage.
Filming new footage
Lights, cellphone, motion! Begin filming by holding down the spherical white recording button. Use the double arrow icon to flip the digital camera towards your self, or to movie what’s in entrance of you.
Whilst you movie, a pink border will seem across the white button. This reveals you the way a lot you’ve filmed up to now.
Use the instruments on the facet of the display screen to boost your content material. Right here’s what they do, from high to backside:
- Music notes: Add music or sounds whilst you’re filming.
- Set the size: Restrict your Reel to fifteen, 30, 60 or 90 seconds.
- Velocity adjustment: Velocity up clips you movie, or movie in gradual movement.
- Format mode: Characteristic a number of movies or photographs on display screen without delay.
- Self timer: This instrument is useful for hands-off filming, and will provide you with a countdown earlier than filming begins.
- Twin characteristic: Movie your self, in addition to no matter is in entrance of you on the identical time.
- The align instrument: Use this to see a translucent model of your earlier clip to align it with the following clip you movie. That is useful for creating seamless transitions, like when an outfit “magically” adjustments whereas the individual wears it and extra—see this instrument in motion under.
- Filters and AR results (sparkle icon): Seek for filters together with ones you’ve saved. That is the place you need to use fashionable results, like greenscreen.
The right way to make an Instagram Reel with current photographs or movies
Repurpose movies and even photographs you have already got. Remodel beforehand posted TikTok or Instagram content material. Or break up current YouTube movies into brief, snackable Reels.
To pick out current visuals out of your cellphone’s library, faucet the sq. picture and plus signal icon within the backside left nook.
If a whole lot of your movies are horizontal, add them to your Reel and faucet the “scale” icon. Alternatively, add your footage as in the event you’re creating an Instagram Story. As soon as within the Story modifying window, use your thumb and forefinger to stretch your footage into vertical, full display screen content material. Then, hit the three dots within the higher proper nook and faucet “save.”
Stage up: Create your first Reel by piggybacking off of another person’s. Remix permits you to put up your personal response or commentary to an current Reel—simply open the Reel you need to use and faucet the three dots within the backside proper.
Step 3. Enhancing your Instagram Reel
Time to place your video editor hat on. After you have your footage, hit “Subsequent” to start out modifying.
Edit the size and order of your clips
Faucet “Edit clips” within the backside left nook. You’ll then see all your clips lined up on the backside.
- To make clips shorter: Faucet a clip. Drag the left and proper ends of the progress bar on the backside of the display screen to shorten your clip.
- To maneuver clips: Maintain your finger down on a clip you need to transfer. When it enlarges, drag it backwards and forwards.
- To delete one clip: Faucet the clip you need to delete. A delete button will seem on the backside of the display screen. Or, maintain your finger down on one clip and faucet on the minus indicators that seem.
Add music or sounds
Music provides rapid leisure worth—in reality, it’s considered one of Instagram’s predominant suggestions for getting found.
Whereas modifying, faucet on the music notes icon. This may take you to an audio modifying display screen. Regulate your video quantity and the quantity of added audio, like songs, by dragging your finger down the columns that seem.
On this display screen, you’ll be able to add three sorts of audio:
- Music: Discover songs in Instagram’s music library, choose sounds and music you’ve saved or import your personal. That is additionally the place you’ll be able to add sounds from different Reels. Remember: music alternatives are restricted for enterprise accounts.
- Voiceover: File a voiceover to talk on to your viewers.
- Sound results: Select from quite a lot of participating sound results.
You need to use all of those collectively, or decide and select.
Whenever you add music, the identify of the track will seem in your Reel. Should you don’t, when folks watch your Reel, your Reel’s sound can be marked as “authentic audio”—in case your account is public, different folks will have the ability to create Reels utilizing that audio.
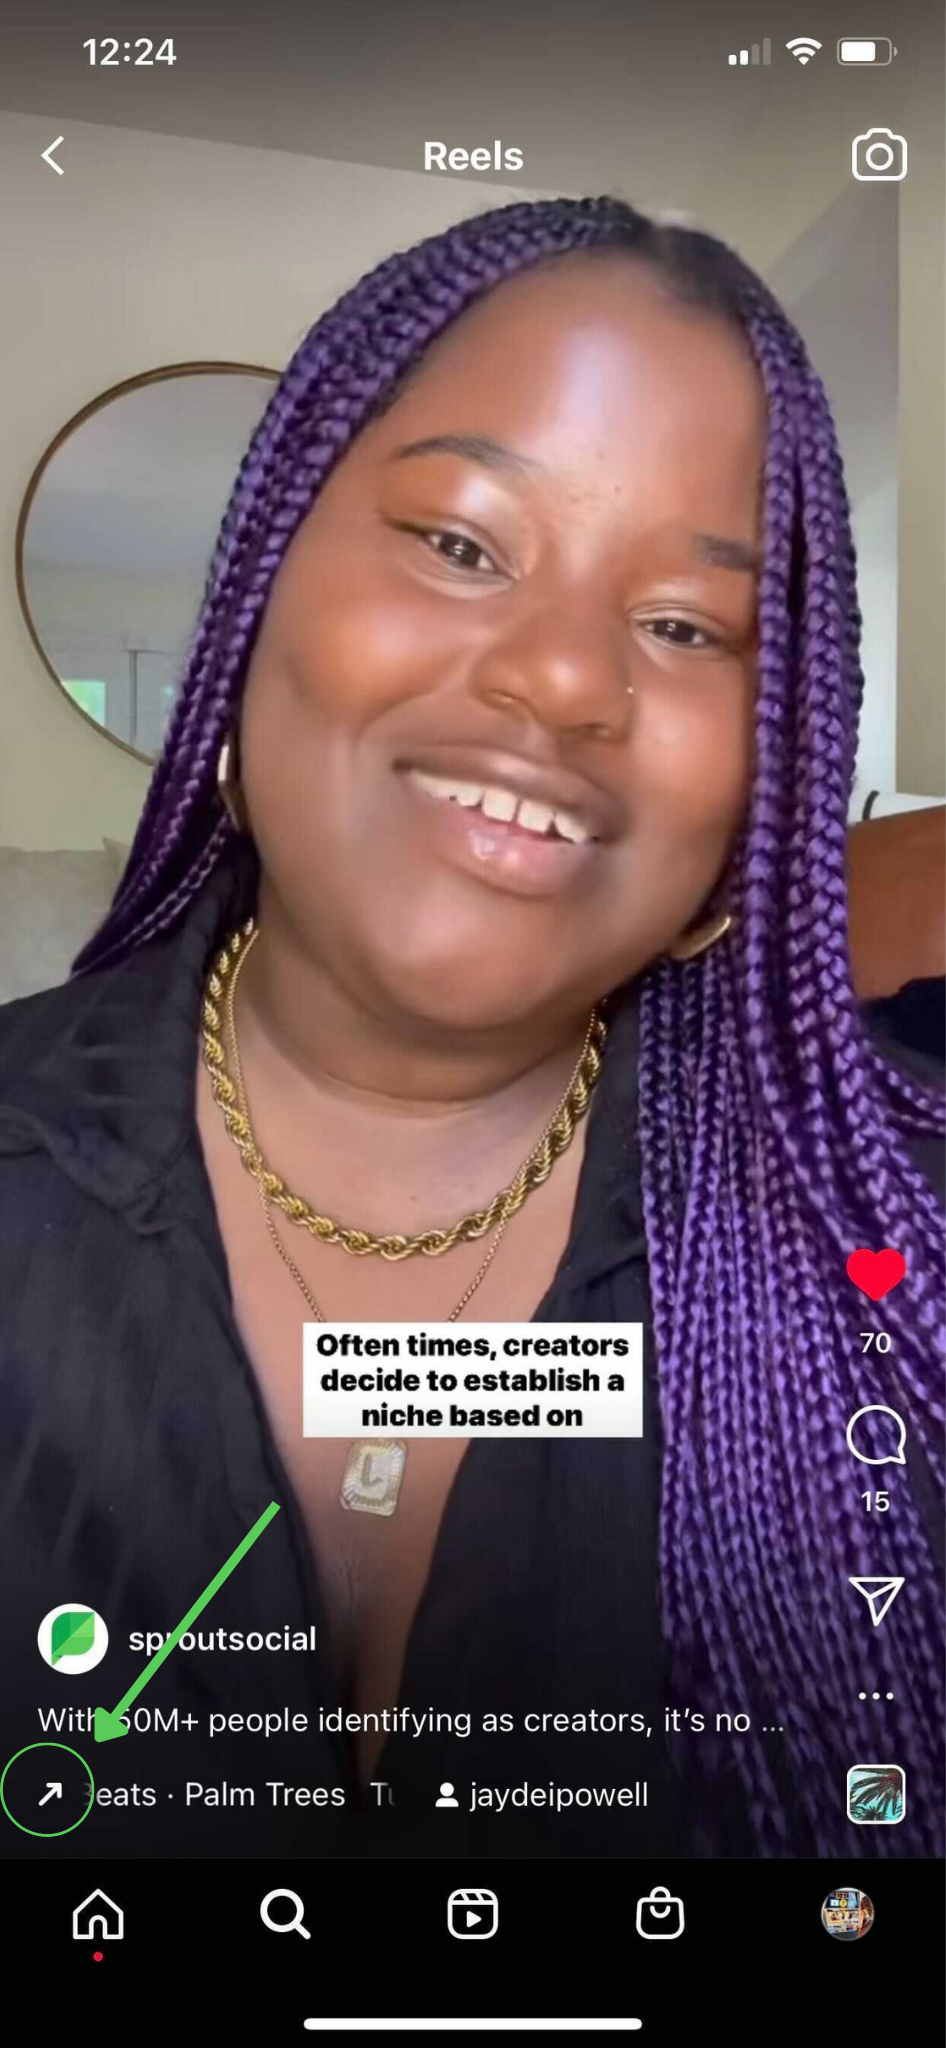
Stage up: Discover trending sounds and songs on Reels. Whenever you open a Reel, a little bit arrow will seem subsequent to the identify of the audio if it’s trending. Faucet on it to put it aside for later.
Add closed captions
Video closed captions are key for social media accessibility. In addition they maintain folks watching—even when their cellphone is muted.
So as to add closed captions, faucet the sq. smiley face icon on the high of your display screen. From right here, you’ll be able to add GIFs, stickers, polls and extra to your Reel. For now, choose “CC CAPTIONS”.
As soon as Instagram has transcribed your audio, customise the model of your captions on the backside of the display screen, and alter the textual content shade on the high of the display screen.
Stage up: Auto-captions aren’t good. Edit them by tapping the textual content because it seems. Then, faucet the phrases you need to right, and hit performed.
Customise your video with textual content
Should you’ve ever created an Instagram Story, this course of will look very acquainted.
Faucet the “Aa” icon within the high proper nook of the display screen. Then, sort in your textual content and customise the look and shade. So as to add extra, faucet the “Aa” icon once more.
Regulate the place your textual content seems by tapping and dragging it to the place you need it to be on the display screen. And set when it would seem and disappear within the video by tapping the corresponding textual content on the backside of the display screen. Then drag the left and proper bars to decide on when the textual content’s length begins and ends.
Delete textual content by tapping and dragging it to a trash icon that seems on the backside of the display screen.
Add filters and AR results
Whether or not you need to add aesthetic filters or a crown of cartoon hearts, faucet the sparkles icon on the high of the display screen to seek for and add new filters and results, or ones you’ve saved.
Step 4. Getting ready and sharing your Reel
Whenever you’re performed modifying, faucet “Subsequent”—that is the place you’ll prep your Reel earlier than you publish. Listed below are the three most essential preparation steps to finish each time:
- Edit your cowl: Faucet “Edit cowl” in your Reel to decide on the way it will show in your profile. You need to use a second out of your Reel, or add a picture—simply be sure it’s related.
- Write a caption: Hold it brief and candy.
- Select whether or not or to not share your Reel to your Feed: In my expertise, sharing to the Feed will increase your attain.
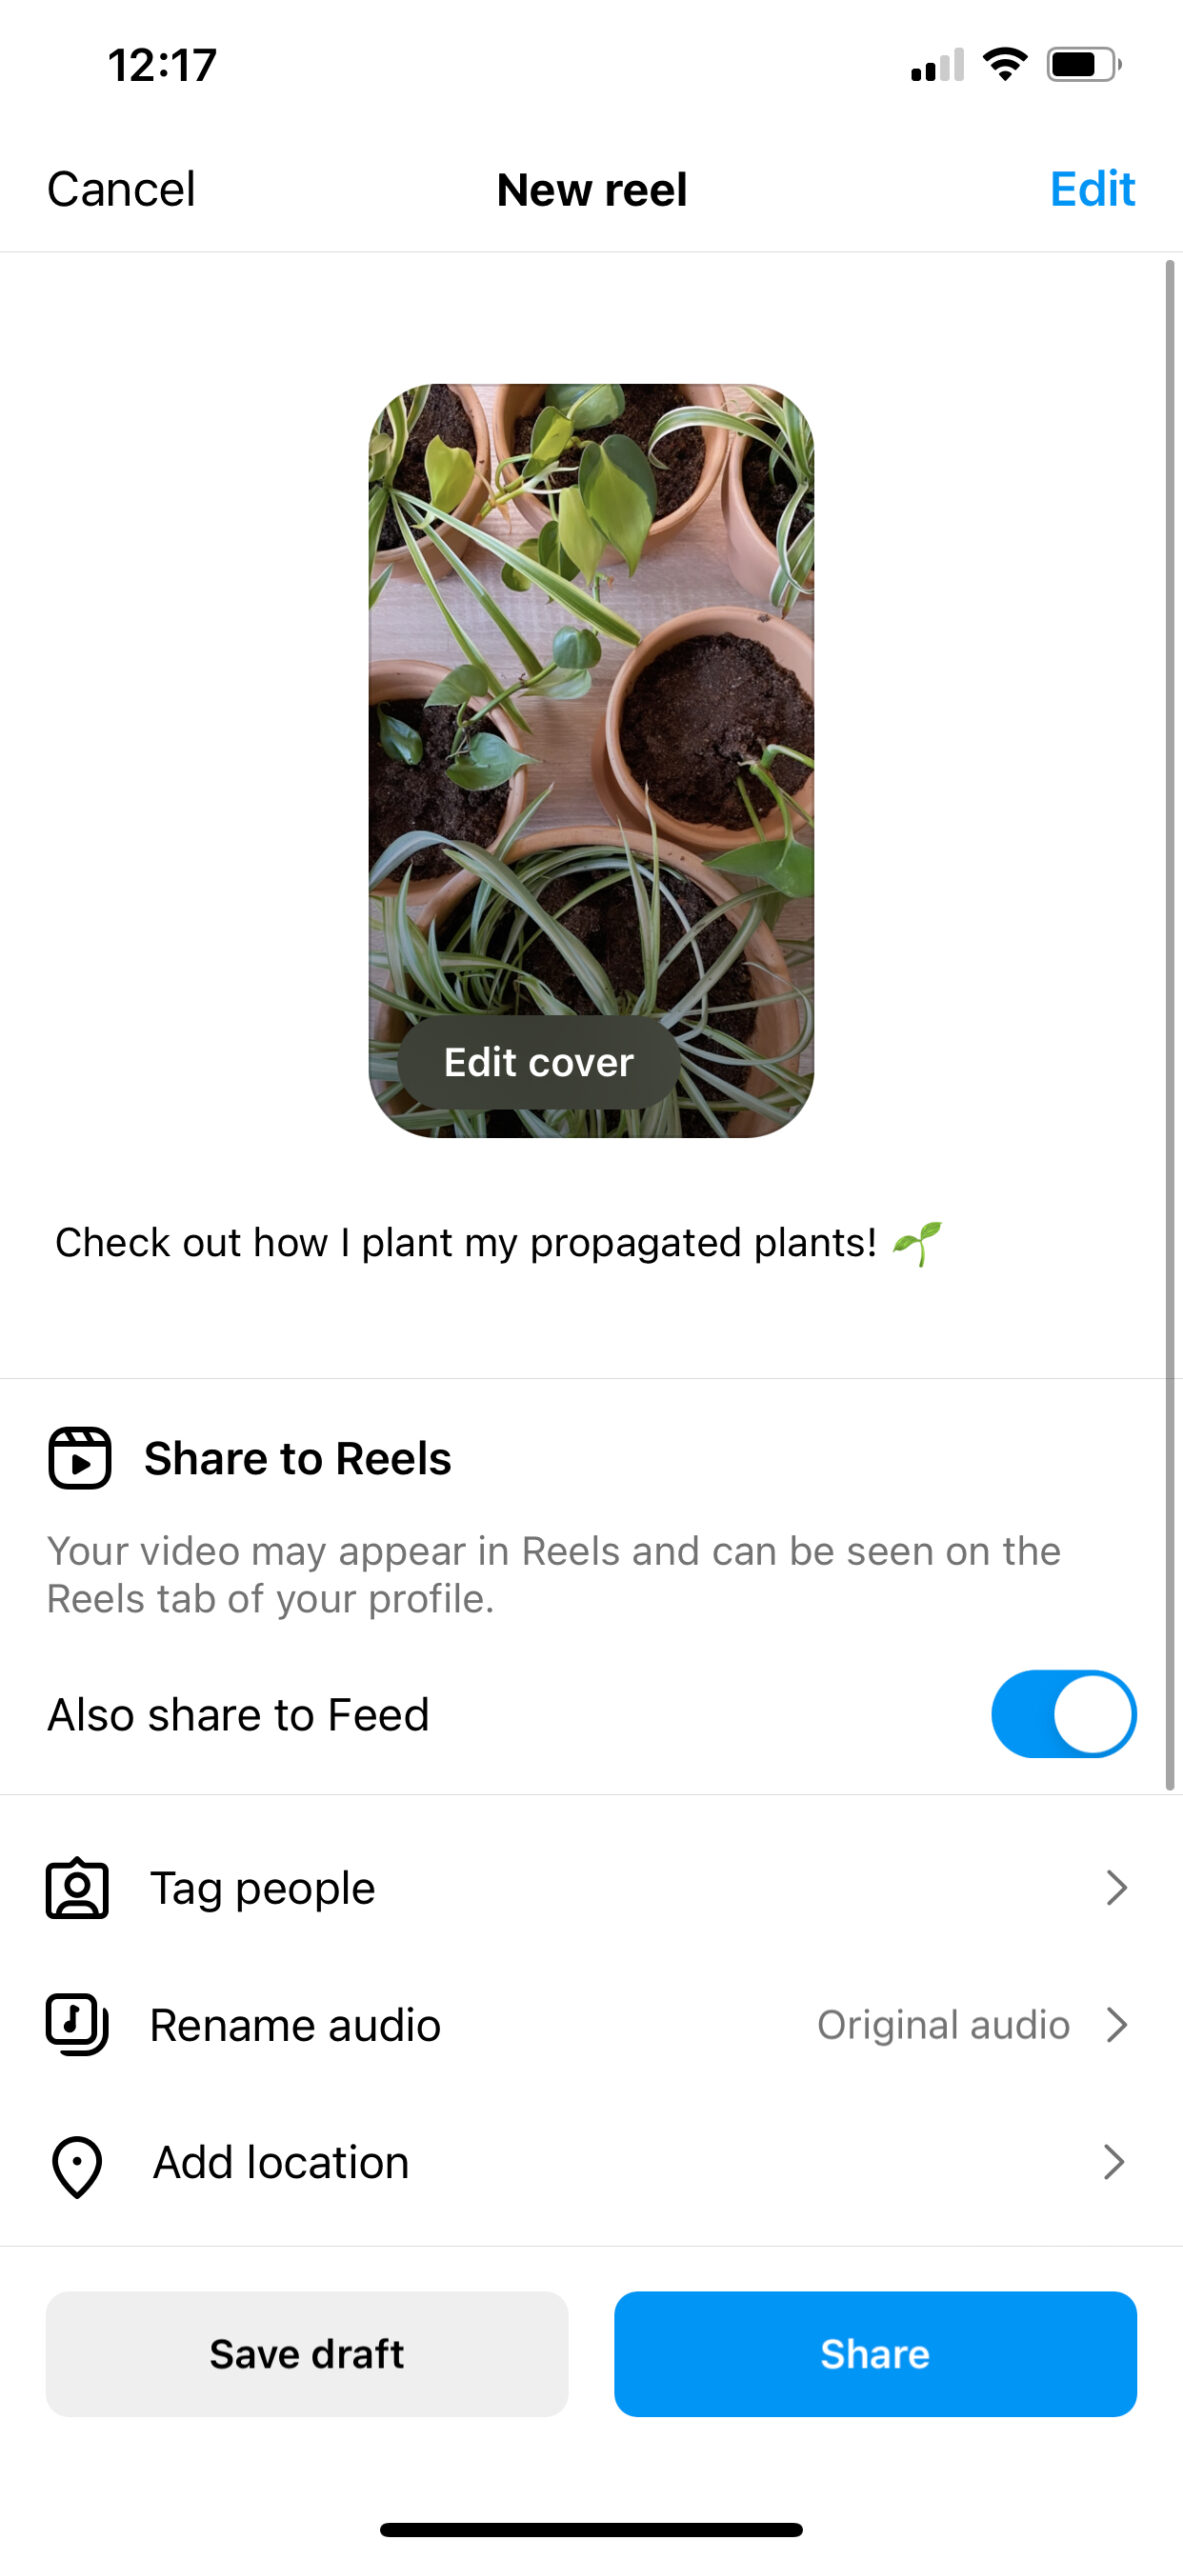
As soon as your Reel is prepped, you’ve got three sharing choices: Publish instantly, save a draft or schedule it.
Choice 1: Publish your Reel instantly
Publishing shortly is essential for leaping on tendencies. When you’ve ready your Reel, merely hit “Share” to ship your Reel out to the world. Then, share it to your Story for additional amplification.
Should you don’t need anybody to have the ability to remix your Reels, head to your Settings and Privateness part to limit this.
Choice 2: Save your Reel as a draft
Should you’re not able to publish your Reel, it can save you it as a draft. When you’re within the window the place you’ll be able to prep your put up, faucet “Save Draft” on the backside of the display screen. Then, discover your Reels drafts later by going to your profile and tapping the Reels icon underneath your bio.
Choice 3: Schedule your Reel, or set a reminder
Scheduling Reels forward of time with a instrument retains your content material movement constant, and takes yet one more factor off your plate.
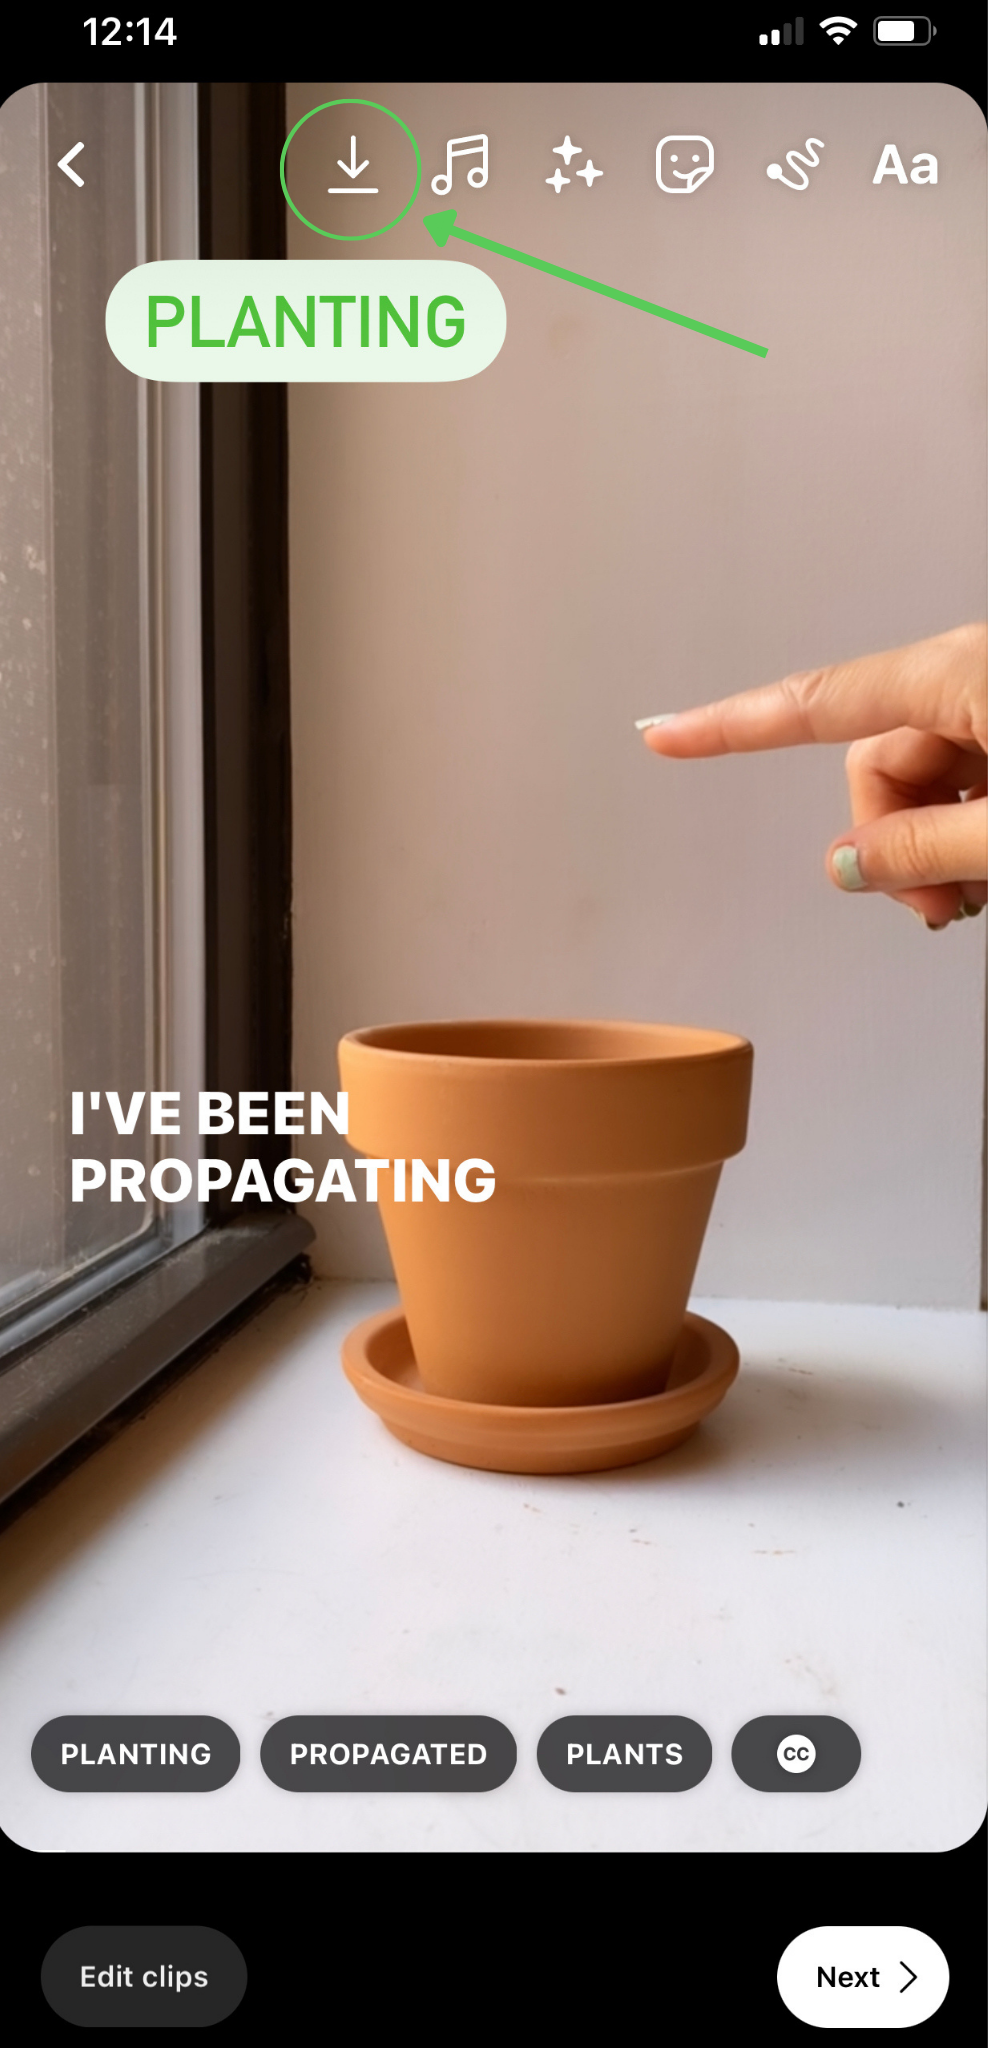
Utilizing Sprout Social, you’ll be able to simply schedule your Reels. When your Reel is prepared, obtain it from Instagram by tapping the obtain arrow.
Then, add it into Sprout the place you’ll be able to prep it in most of the identical methods as on Instagram.
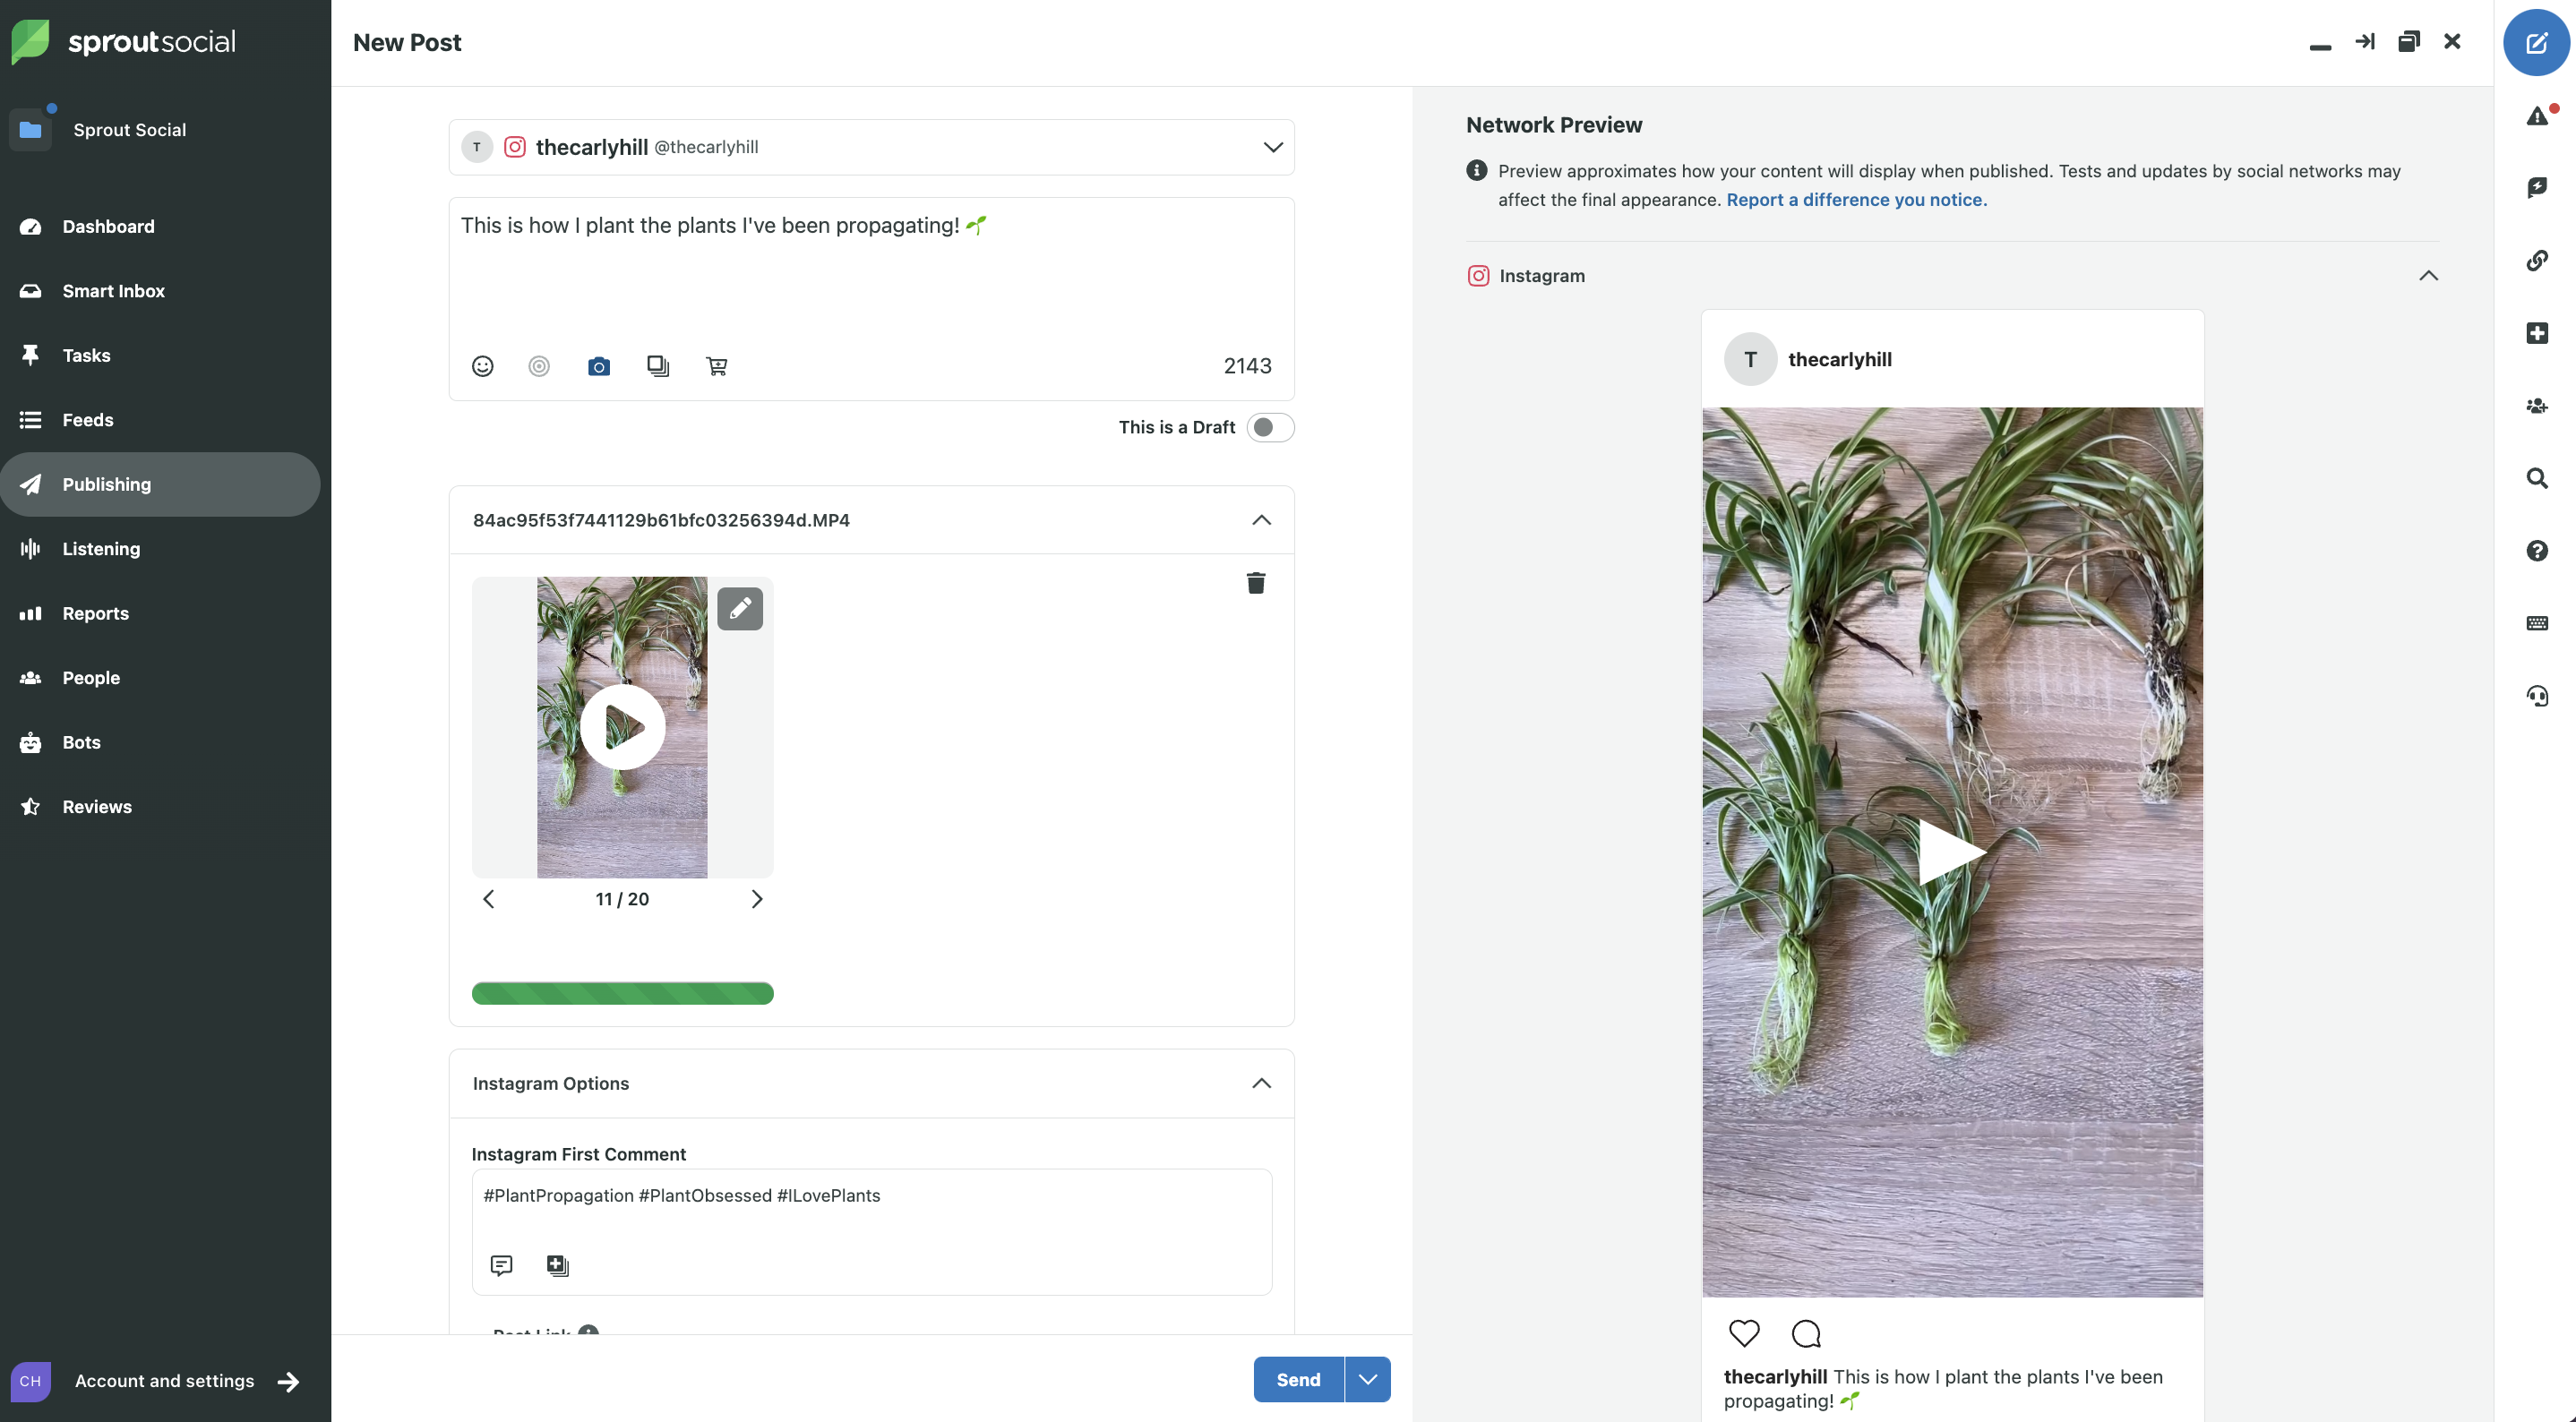
Take into accout: you’ll be able to’t use Sprout for Reels with sounds from Instagram’s music library—however we’re nonetheless right here to assist. Use the Sprout Cellular Workflow to get a reminder in your cellular gadget on the day and time you need to publish your Reel.
Begin making Reels to develop your channel
The one fixed in life is change, and that adage couldn’t ring extra true for social media. Reels could require a little bit follow. Nevertheless it solely takes making one Reel to unlock your video modifying talents and begin connecting along with your viewers in a brand new approach. You would possibly even discover that you simply love the method.
Use this information to make creating Reels reel-y straightforward. Earlier than it, it would really feel so simple as one, two, put up. Now that every little thing about the way to make a Reel on Instagram, try our article about creating an Instagram advertising technique to raise your channel.
